How to Create a High-Converting Shopify One-Product Store: A Comprehensive Guide
In the competitive world of e-commerce, businesses constantly seek innovative ways to capture customer attention and drive sales. A Shopify one-product store offers a streamlined and effective model, focusing exclusively on a single product to maximize its visibility and sales performance. This approach allows businesses to channel all their marketing, design, and operational efforts toward a single product, creating a highly targeted and persuasive shopping experience.
What is a Shopify One-Product Store?
A Shopify one-product store is an online store dedicated to promoting and selling a single product. This singular focus enables businesses to create a cohesive shopping experience that emphasizes the unique features, benefits, and value of the product, leading to higher engagement and conversion rates.
Benefits of a One-Product Store Model
1. Focused Marketing Efforts: Concentrate all marketing resources on driving traffic and conversions for one product, resulting in higher engagement and better ROI.
2. Enhanced Brand Identity: Build a strong, memorable brand identity centered around a single product, fostering brand loyalty and recognition.
3. Simplified User Experience: Provide a seamless shopping experience by removing the complexity of multiple product offerings, reducing friction, and increasing conversion rates.
4. Optimized Sales Funnel: Fine-tune the sales funnel for maximum conversions, from landing pages and product descriptions to checkout processes and follow-ups.
5. Efficient Inventory Management: Simplify inventory management, ensuring better control, reduced stockouts, and improved supply chain management.
Why Choose Shopify for Your One-Product Store?
Ease of Use
Shopify’s user-friendly interface makes setting up and managing a store accessible for entrepreneurs of all sizes.
Customization Options
Choose from a wide range of themes and customization options tailored for one-product stores to create a visually appealing storefront.
Integrated Payment and Shipping Solutions
Seamlessly integrate various payment gateways and shipping solutions for a smooth, secure checkout process.
Robust Analytics and Reporting
Utilize built-in analytics tools for valuable insights into store performance, customer behavior, and sales trends.
Scalability
Shopify’s scalable platform accommodates growth, ensuring your store can evolve with your business.
Key Elements of a Successful Shopify One-Product Store
Compelling Product Story
Craft a narrative highlighting the problem your product solves, its unique features, and the benefits it offers.
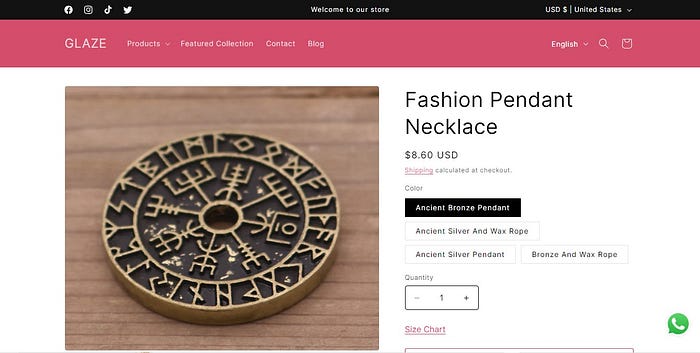
High-Quality Visuals
Invest in high-quality images and videos to showcase your product from multiple angles and in various use cases.
Optimized Product Descriptions
Write detailed, persuasive descriptions emphasizing the benefits and features of your product, incorporating relevant keywords.
Trust and Social Proof
Include customer reviews, testimonials, and trust badges to build credibility and reliability.
Effective Call-to-Action (CTA)
Use strong, clear CTAs to guide customers toward making a purchase, ensuring they are prominently placed on your product page.
Seamless Checkout Process
Simplify the checkout process to minimize cart abandonment, offering multiple payment methods and clear shipping information.
Mobile Optimization
Ensure your store is responsive and optimized for mobile devices to provide a seamless shopping experience on all platforms.
Ongoing Optimization and Marketing
Continuously monitor performance and optimize your store, implementing marketing tactics such as email campaigns, social media marketing, and paid advertising to drive traffic and boost sales.
Step-by-Step Guide to Setting Up a Shopify One-Product Store
1. Setting Up Your Shopify Account
Sign Up for Shopify
Visit the Shopify Website: Go to shopify.com.
Start Your Free Trial
Click on “Start free trial” and follow the prompts to create your account.
Configure Initial Settings
Access the Admin Dashboard: After signing up, you’ll be directed to your Shopify admin dashboard.
Set Up Store Details: Navigate to Settings > General to input your store name, address, and currency. Ensure your time zone is correctly set.
Choose a Plan
Select a Plan: Start with the Basic plan if you are a new business. Navigate to Settings > Plan to choose your plan and enter billing information.
2. Choosing and Customizing a Theme
Select a Theme
Explore Themes: Go to Online Store > Themes in your admin dashboard. Click on Explore free themes or visit the Shopify Theme Store for premium themes.
Choose a Suitable Theme: For a one-product store, select a theme designed to showcase a single product effectively, such as Debut, Brooklyn, or Narrative. Click Add to Theme Library and then Customize to start editing.
Customize the Theme
Header: Upload your logo in the Header section. Set up the primary navigation menu with links to essential pages such as Home, Product, About Us, and Contact Us.
Homepage Layout: Focus the homepage entirely on your product. Add high-quality images and videos of your product and include a prominent call-to-action (CTA) button like “Buy Now” or “Shop Now”.
Colors and Fonts: Choose a color scheme that aligns with your brand and select fonts that are easy to read and reflect your brand’s personality.
Layout and Sections
Product Section: Highlight the key features and benefits of your product with high-quality visuals and compelling descriptions. Include customer reviews and testimonials to build trust. Add sections for product details, usage instructions, and specifications.
Footer: Include links to important pages, social media icons, and a subscription form for newsletters. Add trust badges or certifications to reinforce security and credibility.
3. Adding Your Product
Add Product Listing
Navigate to Products: Go to Products > Add product.
Fill in Product Details: Write a clear and descriptive title for the product, craft a detailed description highlighting the benefits, features, and usage instructions, upload multiple high-quality images, set the price, manage stock levels, and define product weight and dimensions for accurate shipping calculations.
Optimize Product Description
Write a Compelling Description: Focus on the benefits and features of the product, highlight unique selling points, and include usage instructions and care guidelines.
Use Bullet Points: Break down key points into bullet points for easy readability.
Incorporate Keywords: Use relevant keywords that potential customers might use to search for your product.
4. Configuring Payment and Shipping Settings
Set Up Payment Gateway
Navigate to Payment Settings: Go to Settings > Payments.
Choose Payment Gateways: Select from available payment gateways (e.g., Shopify Payments, PayPal, Stripe). Follow the setup instructions and test to ensure smooth transactions.
Configure Shipping Options
Navigate to Shipping Settings: Go to Settings > Shipping and Delivery.
Set Up Shipping Zones: Define shipping zones based on your shipping strategy (local, national, international).
Define Shipping Rates: Offer free shipping for orders over a certain amount, set flat rate shipping or calculated rates based on weight or order total, and consider offering expedited shipping options.
5. Adding Essential Pages
Create Important Pages
About Us: Share your brand story, mission, and values. Explain why your product is the best choice for customers.
Contact Us: Provide multiple ways for customers to reach you (email, phone, contact form). Include business hours and a physical address if applicable.
FAQ: Answer common questions about the product, shipping, returns, and other policies. Regularly update the FAQ section.
Add Legal Pages
Privacy Policy: Inform customers about how their data is collected, used, and protected.
Terms of Service: Outline the rules and regulations customers must agree to when using your store.
Return Policy: Clearly state your return and refund policies. Make these pages accessible from the footer of your site.
6. Optimizing for SEO
Set Up Meta Tags
Navigate to Preferences: Go to Online Store > Preferences.
Set Up Meta Titles and Descriptions: Input meta titles and descriptions for your homepage, incorporating main keywords related to your product.
Optimize Product SEO
Search Engine Listing Preview: For your product, scroll to the Search engine listing preview section.
Edit Meta Details: Edit the meta title and description to include relevant keywords. Ensure URLs are clean and include the product name.
Blogging for SEO
Create Blog Posts: Navigate to Online Store > Blog Posts.
Write Informative Content: Create blog posts about topics related to your product, and optimize blog posts with keywords, internal links, and high-quality images.
7. Installing Apps
Browse the Shopify App Store
Visit App Store: Go to the Shopify App Store to explore apps that enhance your store’s functionality.
Search for Relevant Apps: Look for apps that support your goals, such as improving customer experience, increasing sales, and streamlining operations.
Must-Have Apps
Product Reviews: Install an app like Yotpo or Judge.me to collect and display customer reviews.
Email Marketing: Use apps like Klaviyo or Mailchimp to build and manage email marketing campaigns.
SEO Optimization: Install an app like SEO Manager to help with ongoing SEO efforts.
Abandoned Cart Recovery: Apps like Kit or Privy can help recover sales from abandoned carts.
Social Proof: Use apps like Fomo to show recent purchases and create a sense of urgency.
8. Setting Up Analytics and Tracking
Google Analytics
Integrate Google Analytics: Go to Online Store > Preferences and enter your Google Analytics tracking ID.
Enable Enhanced Ecommerce: Enable Enhanced Ecommerce settings in Google Analytics for detailed insights.
Facebook Pixel
Set Up Facebook Pixel: Go to Online Store > Preferences and enter your Facebook Pixel ID.
Track Conversions and Retarget: Use Facebook Pixel to track customer actions and retarget them with ads.
Shopify Analytics
Utilize Shopify’s Built-in Analytics: Monitor sales, traffic, and customer behavior using Shopify’s built-in analytics.
Regularly Review Performance: Regularly review the Analytics section in your Shopify admin to make data-driven decisions.
9. Testing Your Store
Test Functionality
Conduct Thorough Testing: Place a test order to ensure the checkout process works smoothly. Test different payment methods to confirm they are working correctly.
Check the Fulfillment Process: Ensure order notifications and shipping integrations work as expected.
Check Responsiveness
Ensure Mobile-Friendliness: Make sure your site looks good and functions properly on all devices, including desktops, tablets, and mobile phones.
Use Testing Tools: Use tools like Google’s Mobile-Friendly Test to check responsiveness.
Adjust Design Elements: Adjust any elements that do not display correctly or function properly on different devices.
10. Launching Your Store
Remove Password Protection
Disable Password Protection: Go to Online Store > Preferences and uncheck the box to disable password protection.
Save Changes: Click Save to apply changes and make your store live.
Promote Your Store
Social Media Marketing: Create profiles on platforms like Facebook, Instagram, and Twitter. Post regularly about your product, promotions, and blog content.
Email Campaigns: Use your email marketing app to send welcome emails, product announcements, and special offers.
Paid Advertising: Run targeted ads on Google and social media platforms to drive traffic to your store.
Influencer Partnerships: Partner with influencers to reach a broader audience and build credibility.
SEO Efforts: Continuously work on your SEO strategy by updating product descriptions, blog posts, and metadata.
Additional Tips for Running a Successful One-Product Store
Customer Engagement and Support
Live Chat: Install a live chat app to provide real-time support and answer customer queries.
Customer Feedback: Actively seek customer feedback to improve your product and services. Use feedback to make necessary adjustments and enhance the shopping experience.
Inventory Management
Stock Levels: Regularly monitor your inventory levels to prevent stockouts. Set up inventory alerts to notify you when stock is running low.
Supplier Relationships: Maintain good relationships with your suppliers to ensure timely restocks and quality products.
Seasonal Promotions and Campaigns
Holiday Sales: Plan promotions around holidays and special events. Create themed banners and discounts to attract customers.
Subscription Plans: Offer subscription plans for regular deliveries of your product to ensure consistent sales and customer retention.
Analyze and Improve
Performance Metrics: Regularly review performance metrics such as sales, traffic sources, and conversion rates. Use these insights to make data-driven decisions.
Continuous Improvement: Keep your store updated with the latest trends and customer preferences. Continuously improve your product offerings and website features based on customer feedback and analytics.
Creating a high-converting Shopify one-product store involves focusing on a streamlined and highly optimized shopping experience that highlights your single product’s benefits and drives conversions. By setting up your account, choosing a suitable theme, adding and optimizing your product, configuring payment and shipping settings, adding essential pages, optimizing for SEO, installing relevant apps, setting up analytics, testing your store, and promoting it effectively, you can create a successful one-product store that attracts and retains customers. Remember, continuous improvement and staying responsive to customer needs are key to long-term success.
My Portfolio on Behance
My Services on Fiverr
#webDesign #articleShopify #shopifyOneproductstore #onlineStore #dropShipping

Comments
Post a Comment